Disclosure: I am an affiliate for Bluehost, and will receive a commission if you sign up through my referral link at no additional cost to you. Thank you for reading and supporting my blog! Please see my disclaimer page for more information*
If you have visited this site before, then you know we are all about side hustlin’ and making money here at The Blissful Budget. And one of my favorite (and now full time) side hustles is… Blogging!
It is such an amazing feeling to pick a topic you are passionate about and write about it to share your knowledge with the whole world!
Plus, it feels awesome to meet new people and see your visitors get excited to read what you have to say.
You can easily start a money-making blog in under 30 minutes and for just a few dollars per month! You will also get a free domain name through Bluehost with my link below.
Before we get started, click here on my link so you can follow along with the instructions in this post.
Let’s get started!
Getting Started
In order to start your blog, you will need:
- A blogging platform – This is where you will write, edit, and create your content/blog posts. Ex. WordPress
- A hosting company – The space on the internet where your website is stored and maintained. Ex. Bluehost
- A blog theme – The appearance and display of your blog. Ex. Divi Theme
This tutorial uses WordPress as the blogging platform and Bluehost as the hosting company. I highly recommend using these tools because:
WordPress and Bluehost work seamlessly together and make the user experience extremely easy. I would not consider myself tech-savvy AT ALL and I was able to set up my blog through Bluehost without any confusion whatsoever.
Most successful bloggers use WordPress because of the customization options (plus, it is the most powerful platform out there)
Bluehost’s customer service is better than any other hosting company.
Bluehost is extremely affordable. The free domain name is an added bonus.
WordPress is FREE through Bluehost.
With Bluehost, your blog will be self-hosted (I will explain why this is important below).
Another option is to set up your blog for free, but let me explain why this is not the best option.
First off, if you want to monetize your blog and make money from it, starting off with a free blogging platform will make that nearly impossible. With a free platform, you are not able to run ads (how most bloggers usually start off making money) and you will be very limited with the ways you are able to monetize.
Second, you wouldn’t own your domain name. This will make you appear very unprofessional and untrustworthy to the people visiting your blog.
There are many other reasons you shouldn’t use a free blogging platform, but those were just a few. I personally don’t know of any bloggers that have ever made any money with a free blogging platform.
So how much will it actually cost to start a blog?
It is fairly affordable to start up your blog and if your goal is to make money with it, I would say it’s a pretty good return on your investment.
The costs you can expect upfront are:
Hosting plan: $3.95 per month (paid annually) + the free domain name
Optional – A paid theme: Anywhere from $89-$360 (don’t panic, this is completely optional)
Optional – Business email service: $29 per month (recommended but again, optional.)
If you are going to make blogging a side hustle, or even a full-time income, you should be able to earn back the amount you spent upfront within the next few months.
How to Start Your Blog With Bluehost
If you didn’t get a chance to click on the link above, you can click here to get started with Bluehost.
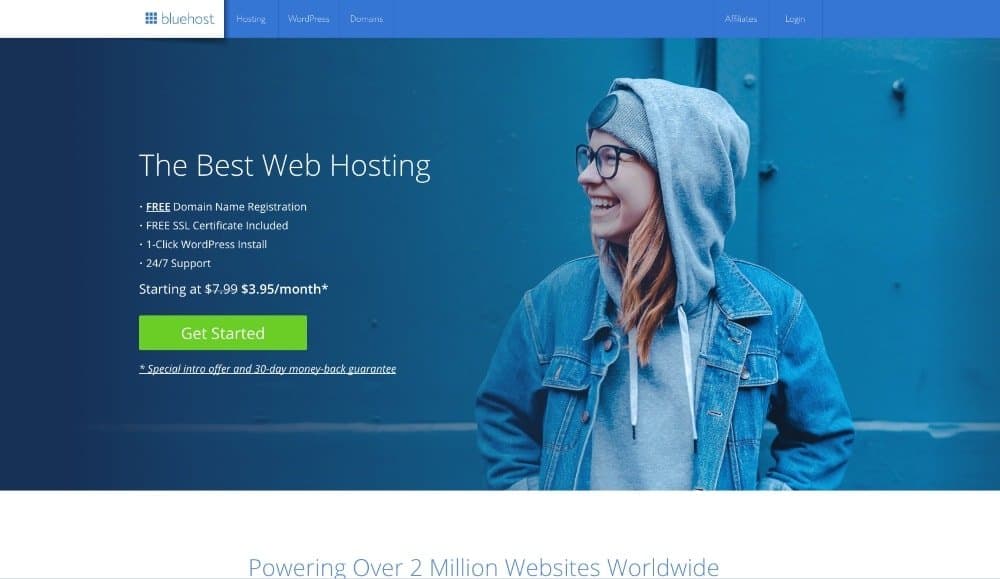
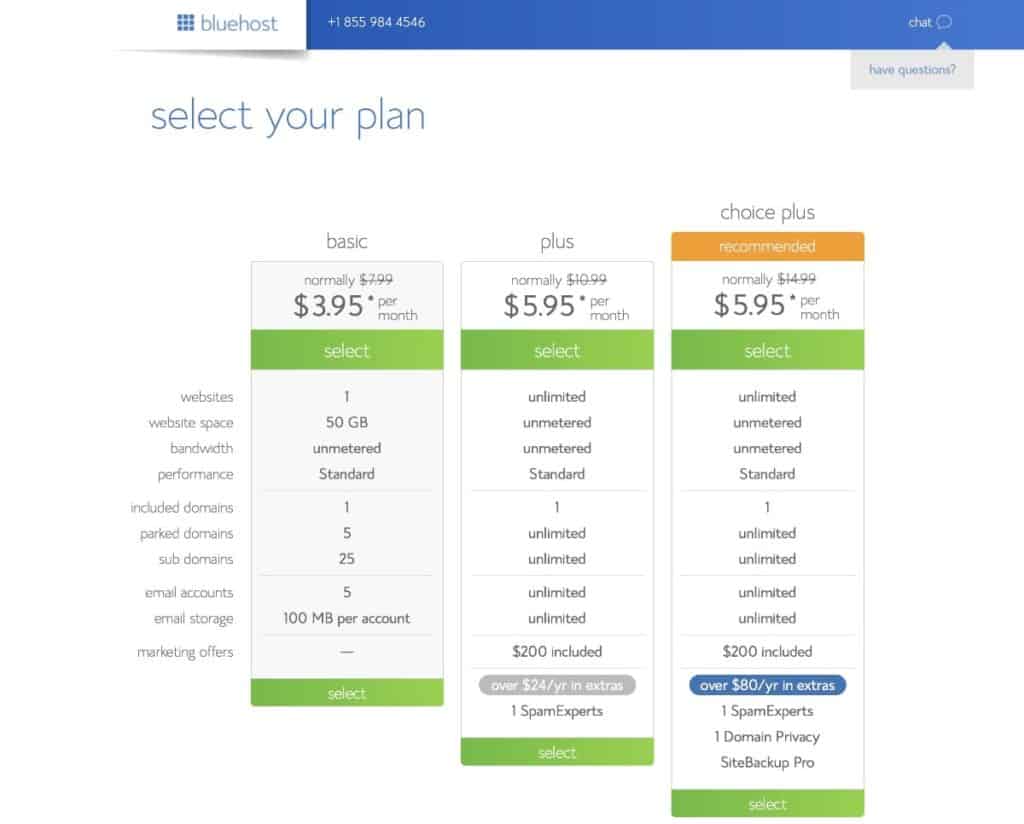
Once you select the “Get Started” button on the homepage, you will be directed to choose a plan.
You will notice that Bluehost recommends the “Choice Plus” plan, but unless you are trying to set up multiple websites and domains, you won’t need any of the extras that come with it.
I highly recommend choosing the “basic plan” to start off with.
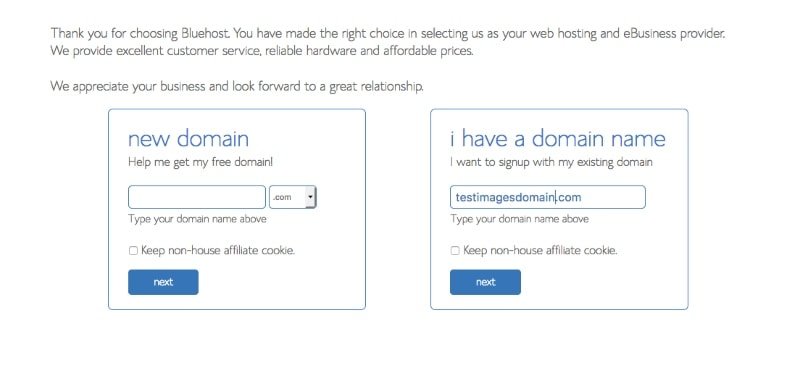
After you choose your plan, you will need to pick your domain. The domain name is what will identify your site on the internet.
For example, your domain name will look like: www.yourdomainname.com.
I encourage you to spend some time choosing a domain name. Some bloggers might argue this, but personally, I believe your domain name is extremely important to the brand you are going to build.
You can change your domain name later on if you end up not liking what you choose, but it is a bit of a process and I recommend finding a domain name that you are confident with to start off.
If you need to take some time to think about it, you can always skip this step for now and choose your domain name later after the set up is complete. (You will see a link on the bottom of the domain name screen to create your domain name later.)
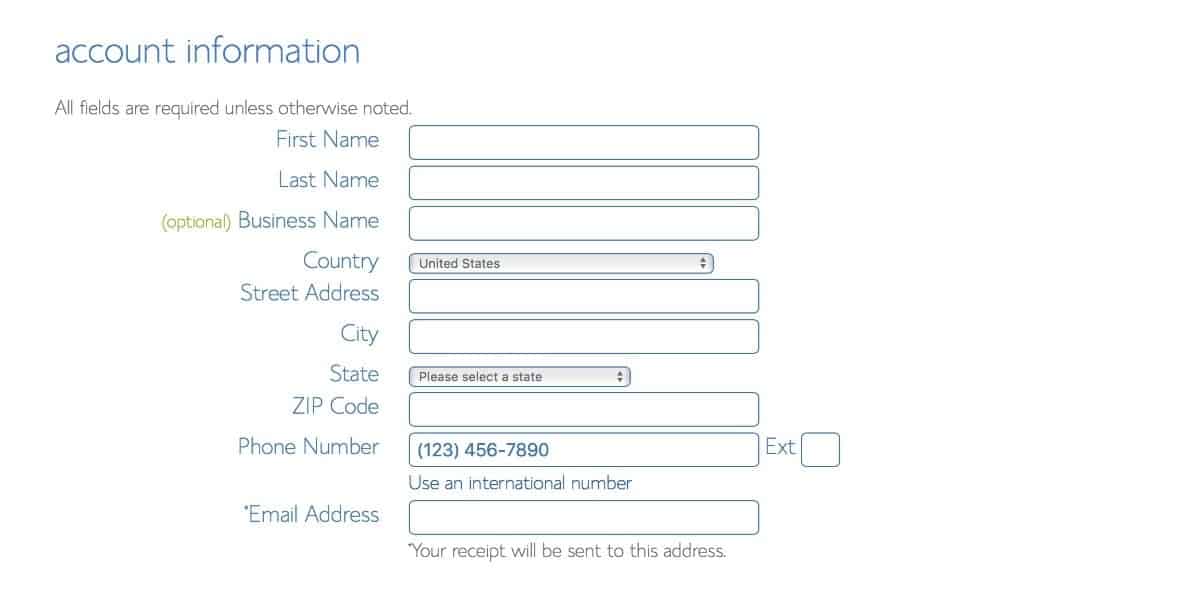
After the domain page, you will need to create your account.
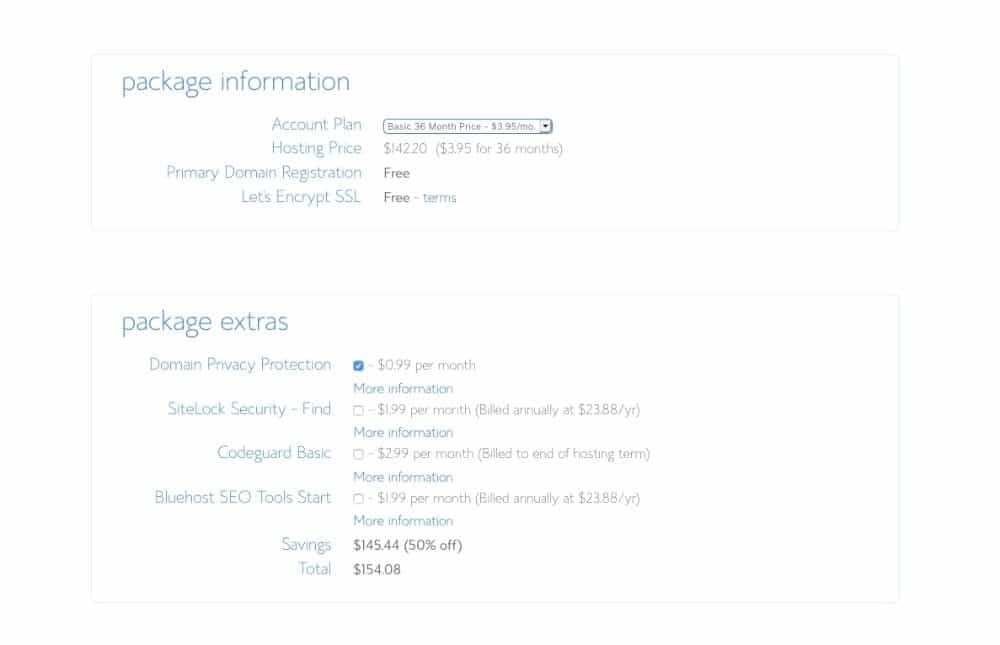
After filling out your information, you will need to scroll down to the “package information” to select the length of your plan.
I recommend selecting the 36-month plan because it is the overall best pricing value for your money, however, the 12-month plan works just as well.
After choosing the length of your plan, you will need to scroll down to choose your “package extras”.
I would highly suggest unchecking all of the package extras except for the Domain Privacy Protection (as shown above). This protects your personal information so that your personal details stay private.
Note: If you skipped the domain name part, you will NOT see the Domain Privacy Protection option until you decide to register your domain name later. Then you can purchase the Domain Privacy Protection as an addon when you set up your domain name.
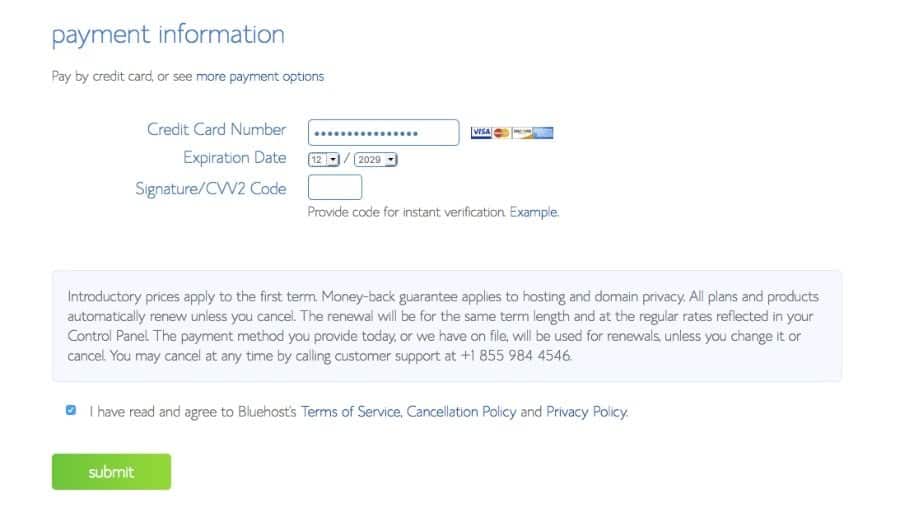
Next, you will need to put in your payment details, click the checkbox to agree to Bluehost’s Terms and Policies, and click the “submit” button.
You now have a blog! Whoo-hoo! Easy-Peasy, right?
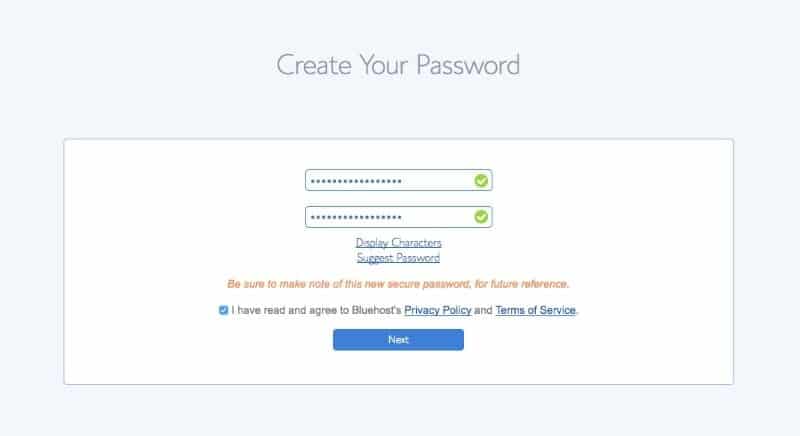
Now that you have your blog and hosting plan set up, you will be directed to set up a secure password.
Create your secure password and store it somewhere safe for future reference.
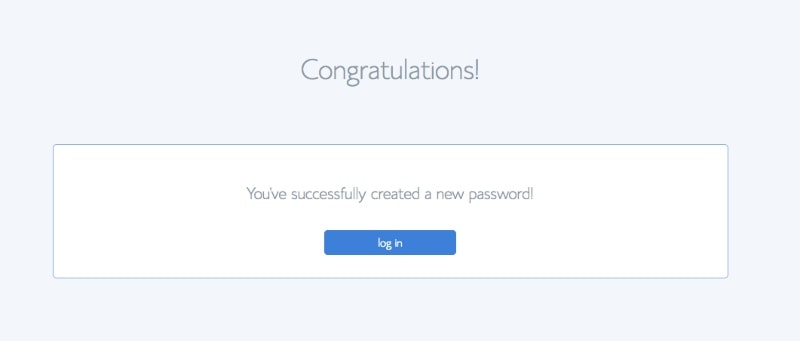
Once your password setup is complete, you will be directed to this screen:
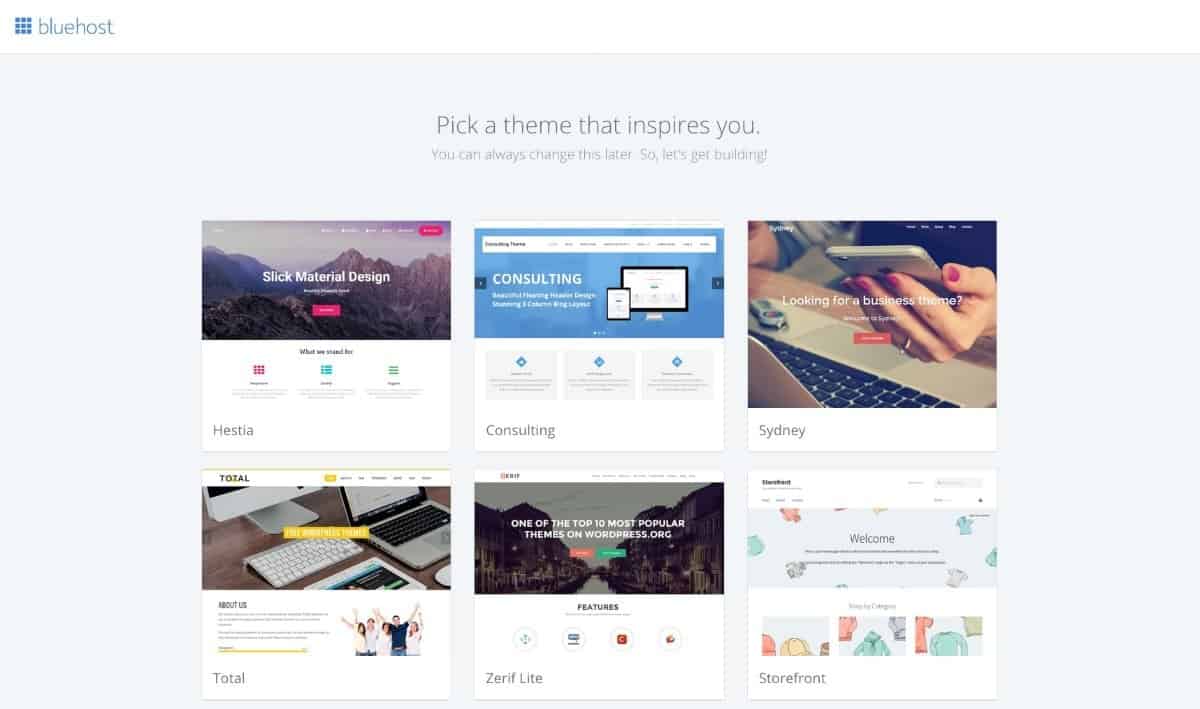
Once you click the “login” button, you will get to pick your WordPress theme. The options shown are their list of free themes that you can choose from to customize your website:
You can always change your theme at any time so don’t worry too much about this here.
After you select your theme you will be directed to the screen that says All Done!
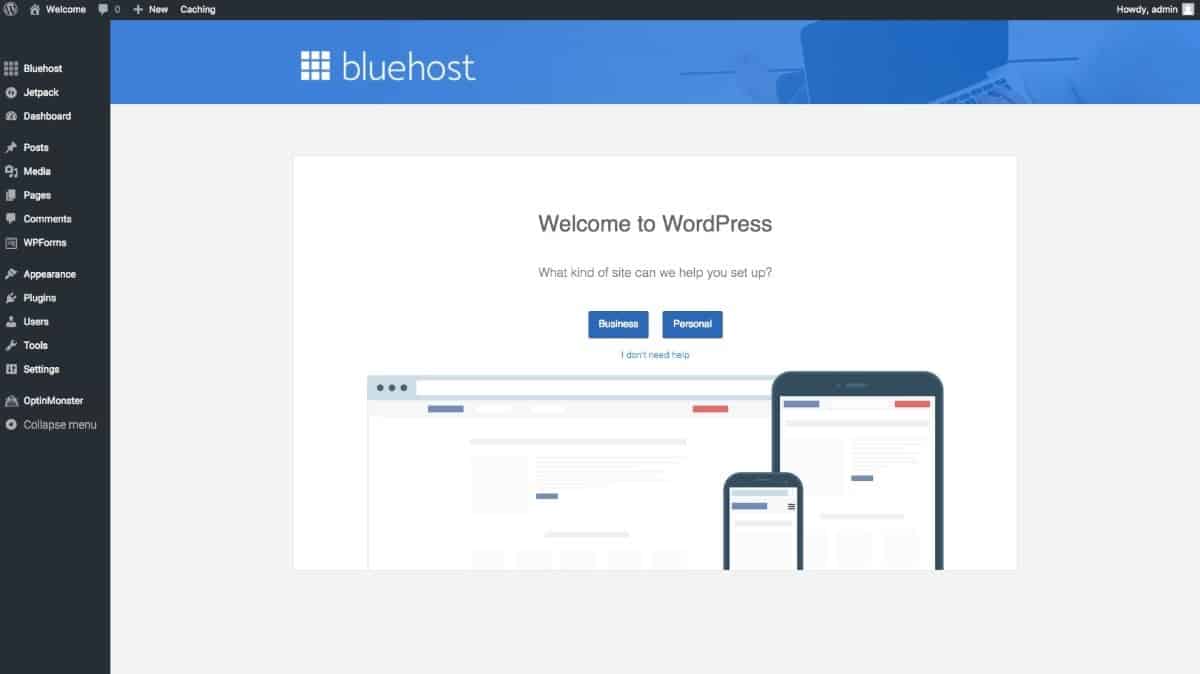
Click on “Start Building” to go to the next screen. Then you will be sent here:
From here, you will select the “Business” button. (If you accidentally press “personal”, that’s ok. It doesn’t really make a difference either way).
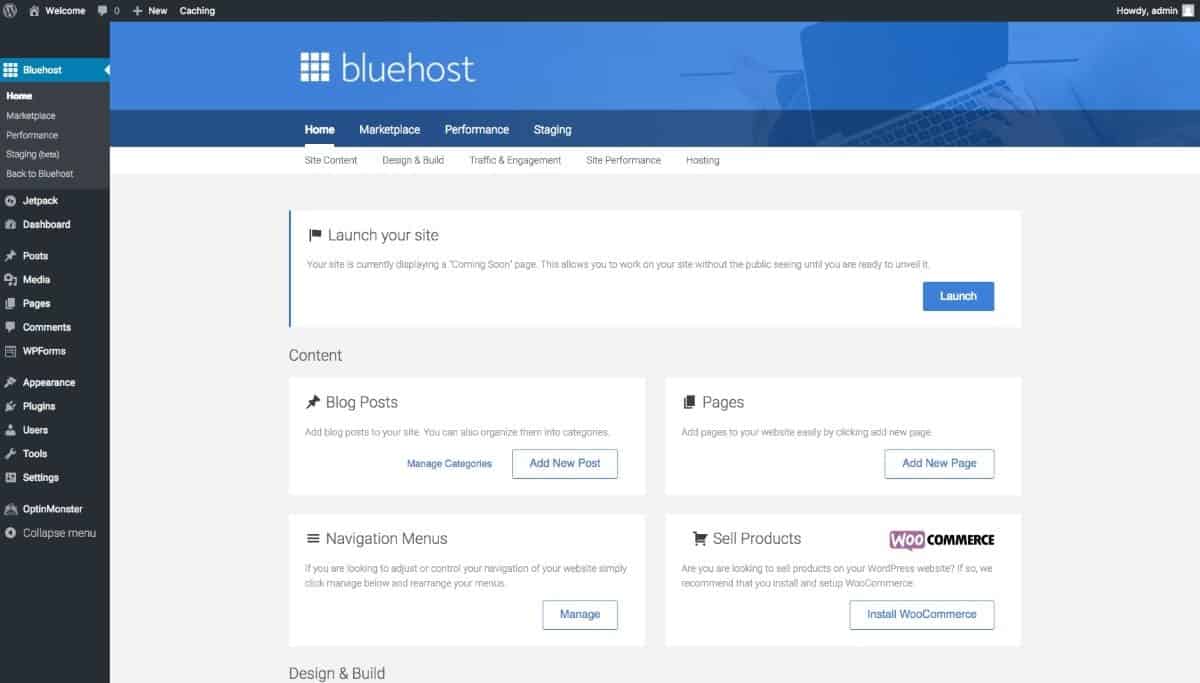
After this, you will be directed to the WordPress Dashboard:
From here, you can click “Launch” to launch your new website!
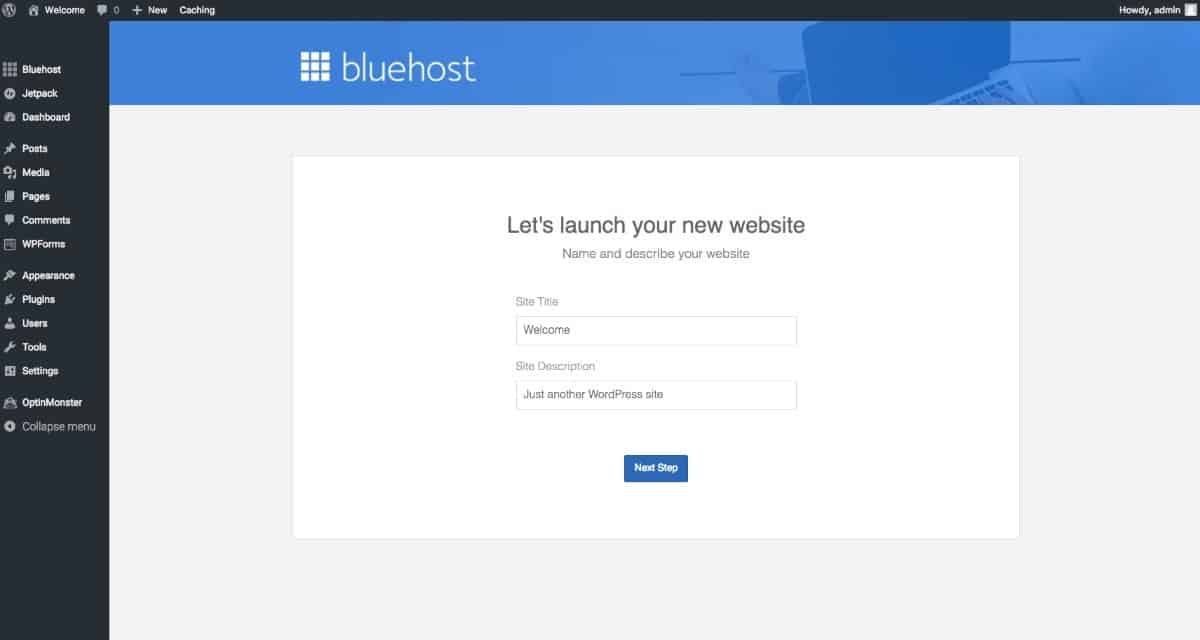
Then you will be directed to set up your Site Title and Site Description. You can either skip this step to set up later, or you can put in a simple description of what you want your blog to be about.
You may be asked if you want to display recent posts or if you want a static homepage. I recommend using the static homepage, but you can change this later.
Note: You will need to verify your email during the set-up process. This will be the email account you used to sign up initially.
And there you have it! Now you can start writing posts and designing the look of your blog with WordPress!
How to Access Your WordPress Dashboard Through Bluehost
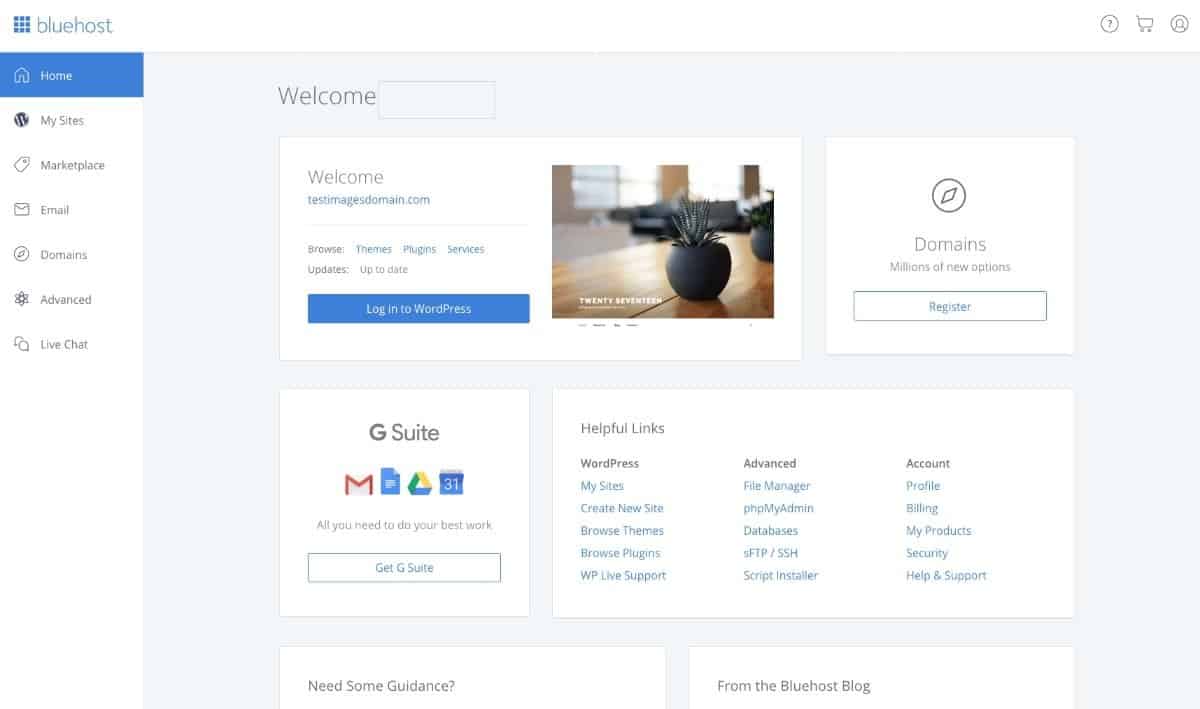
Once you set up your website, you will be able to sign in to your WordPress Dashboard directly through Bluehost. You can do this by going to Bluehost.com and signing in with the username and password you created earlier.
You will be directed to a screen that looks like this:
From here, you can navigate to “My Sites” on the left side of the screen, then click on “Log in” under your website. This will take you to your WordPress Dashboard.
How to Navigate Through WordPress
WordPress can look extremely intimidating at first, however, once you get the hang of what each section is about, you’ll be a WordPress master in no time.
In this section, I will give you a few tips on how to navigate through your WordPress Dashboard.
Posts
The Posts section is where you will be writing and editing your blog posts. You can click “add new” at the top to create a new article, and you can edit your posts at any time, even after they are published.
Media
The Media section is where you can add and delete the photos that will go anywhere on your website (on your homepage, within your posts, etc.)
Pages
It might be difficult to differentiate posts and pages at first.
As stated above, “posts” are your individual blog posts and can be updated whenever you like.
Pages can also be edited at any time, however, they are not blog posts. Some examples of pages you will have on your website include:
- Your homepage
- Legal Pages
- Contact page
- About me page
These are stationary pages that are not edited quite as often.
Comments
Once you have a few blog posts posted, people will have the option to comment on your posts.
The comments section is where you can read and reply to the comments that are left on your blog posts.
Appearance
The Appearance section is where you can change your theme, add widgets, and update your header and footer menus.
If you want to stick with a free theme for now, I totally understand. However as you continue through your blogging journey, you may want to upgrade your theme to a paid theme for more customization options.
I personally use Divi Theme by Elegant Themes because of the number of customization options. They also offer a drag and drop visual builder which makes creating pages and posts easy and user-friendly.
Genesis Theme by StudioPress is another great paid option as well.
If you are looking for a free theme to start off with, Neve is a great option.
Plugins
You can think of plugins as “add-ons” to your blog that allow you to customize your blog even further on top of what your theme can do.
Some plugins can help with site speed, optimizing photos, creating an author box, etc. I will link a post at the end of this tutorial with my preferred blogging tools where I list some of my favorite plugins.
Users
You probably won’t be using this tab very often, but you will want to update your user information here, and you can add other users if you ever decide to give someone access to your website (like a web developer).
Settings
In the Settings tab, you will be able to edit some of your display settings and change the settings on different plugins that you install.
Like I said earlier, navigating through WordPress can be difficult when you first start out. I recommend clicking through each tab a few times and scrolling through the options on each page. This will help you understand where to go if you ever need to fix or change something later on.
This tutorial on “how to start a blog” is a great place to start, but if you want more detail on how to move forward from here, I recommend following a blogging course.
My favorite courses are the Create and Go blogging courses by Lauren and Alex. These are the courses I started with and they helped me get started with a lot more detail than can be written in a single blog post.
If you aren’t ready to fully commit to a blogging course yet, I totally get it! I was hesitant to go straight to a course as well.
In that case, here are some additional resources to help you grow your blog on your own:
20 Amazing Blogging Tools to Help Grow Your Blog
Legal Pages You Must Have on Your Blog
10 Work From Home Tips to Keep You Productive and Motivated
With all of that being said, I hope you enjoyed this tutorial on how to start a blog with Bluehost.
I would love to hear from you! Did you set up your blog yet? What niche did you pick? Let me know in a comment!
Hey there, welcome to my blog!
I’m Swati, a mom, a personal finance enthusiast, and the owner of TheBlissfulBudget. My work has been featured in major publications including Fox 10, Credit Cards, Cheapism, How to Fire, Databox & Referral Rock.
I help busy budgeters like you save and make money by utilizing simple yet effective methods that can create wonders.
My Mantra: You are entitled to live the life you desire, and financial bliss should be simple to obtain–check out my blog for helpful tips on acquiring wealth easily.


This post has so much important information- I wish I would have seen this before starting my blog!!
Hi Hallie! I’m glad you enjoyed the post!
I should have read your post a couple of months ago before starting my blog!!! It took me days, well weeks, to set up the blog properly!!!! Very informative post. Thanks for sharing
It can definitely be difficult trying to set it up on your own! I’m glad you found the post useful!
I love that this is a very easy-to-follow guide with lots of good suggestions. I’m sure it’s going to be a fantastic resource for new bloggers or those who are new to WordPress. Thanks for sharing 🙂
Hi Kirsten! I really appreciate your kind words, I’m glad you found it helpful! Thank you for commenting!
These are all great tips! Thank you for providing these visuals, they were so helpful.
Hi Victoria! Thank you for the comment, I am glad you found the post helpful!
I use bluehost too! This blog post is quite a comprehensive tutorial. I’ve been working on mine myself, but it is still a very rough draft that isn’t ready for publishing yet. Great job on yours! 😀
Hi Ming! Thank you for commenting! These types of posts are definitely time-consuming… Good luck on your post!